
In my last post I described how to extract the firmware, this was quite easy. But to rebuild a firmware is something different.
This is a three part long story
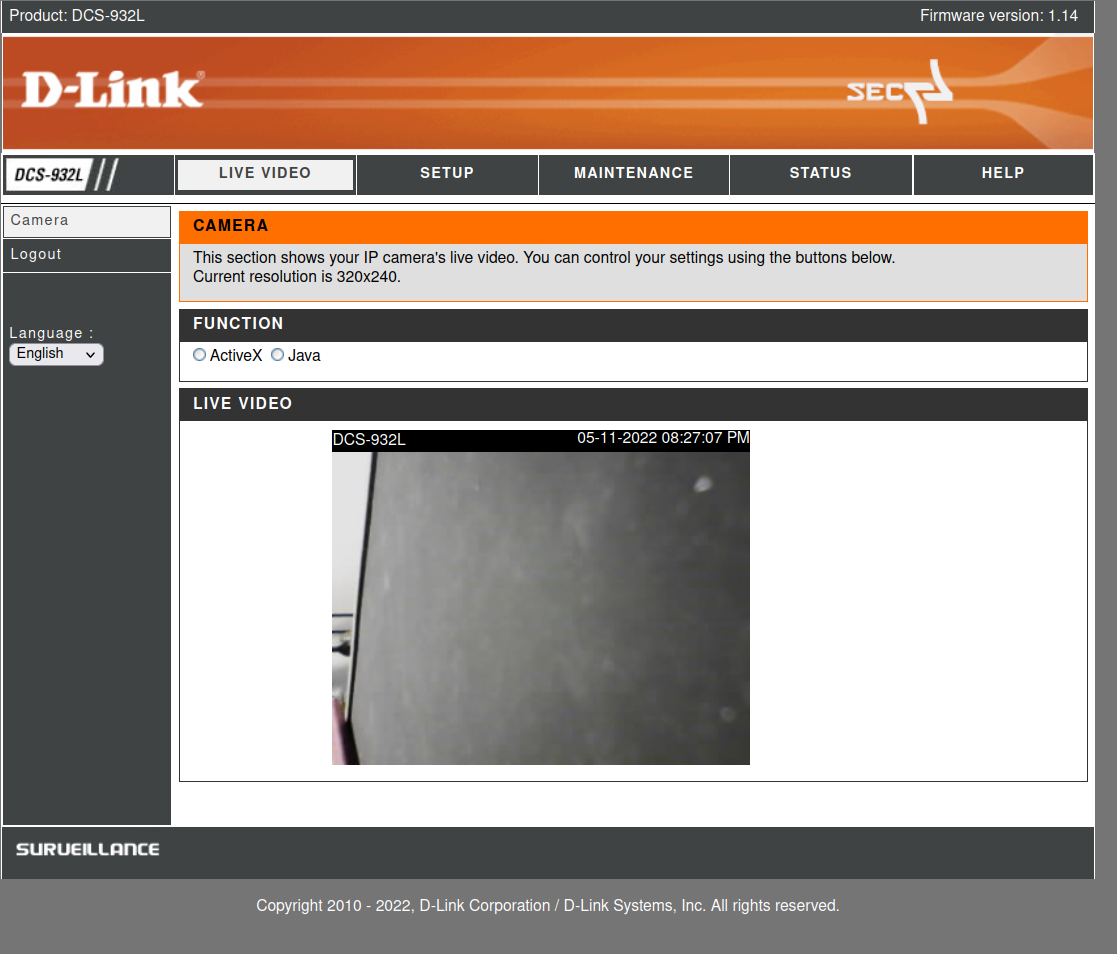
- RE: DC-932L Hacking a Webcam Part 1 – Getting a Shell
- RE: DC-932L Hacking a Webcam Part 2 – Extracting the Firmware
- RE: DC-932L Hacking a Webcam Part 3 – Building the Firmware
I need to be honest here, just remembering back to this process is painful, I will just describe some problems about the whole process that comes up for me here. In the end of the blog post you will find the final script for it.
Issue 1: LZMA
First of all, the compressing. There are two lzma archives in the firmware, what we need to re-create from the extracted data. That sounds not like a problem at all but as we dealing with an old firmware image this is something we need to take care about. The are many versions out of lzma and unfortunately they changed some of the compression logic, so if you compress the data with some actual lzma version, the data will hugely differ to the one from the original firmware image.
The second problem, there are many available options for the compressing, like compression level, fast or slow mode, streamed or non-streamed, size of the dictionary etc.
To give you a short cut, the firmware was build withe the lzma-4.32.0beta5, you can find the download here:
you need to build it with the following commands
./configure
make
These are the options what I used to compress the kernel archive
lzma/src/lzma/lzma -z -k -f -9 -c kernel_image > kernel_image-lzmaThese are the options what I used to compress the cpio archive
lzma/src/lzma/lzma -z -k -f -5 -c root_fs.cpio > root_fs.cpio.lzmaOptions:
- -z = compress the archiv
- -k = remain original file
- -f = force
- -9 = compression level
- -c = redirect to stdout (that we can write to a desired file name)
Issue 2: Checksum
As soon you re-compress the extracted files, regardless if you change something or not, and try to make a firmware upgrade with your new image, it will fail. If you do the upgrade via the web interface you only get „invalid file“.
This was one of the hardest parts and took me the most of the time to figure it out.
First I started to analyse the file system more and found the binary /bin/upgradefw. With this binary you can upgrade your firmware via the shell.
But how we can get our image to the device? The shell is very restricted and without ncat, curl, wget, python and bash the options are limited, but thankfully openssl is available.
So we just generate a certificate and start a openssl server
openssl req -newkey rsa:2048 -nodes -keyout key.pem -x509 -days 365 -out certificate.pem
openssl s_server -quiet -accept 80 -cert certificate.pem -key key.pem < dcs932l_v1.14.04.bin.custom
On the device we use the following command to download the new firmware
openssl s_client -connect 192.168.178.22:80 -quiet > dcs932l_v1.14.04.binNow we can pass our image as argument to /bin/upgradefw and you will get the error message „checksum is not correct“.
Well, the problem with checksums is, there are uncountable possible options how these are calculated:
- Is the checksum about the whole file or only about one or more parts
- Is the checksum itself included in the file or not
- Are there some magic bytes or numbers in the final check
- Is the checksum depended on some other checksums or the filesize
- and so on.
After hours of starring at the hexdump from the fimware and tries to change some bytes in the original firmware, to see what will break the checksum check (any change will break it), I started Ghidra and tried to find out how this check is done. In the binary upgradefw I found the function check and the output if the check fails
Checking the corresponding If statement, we can see how the check works. I already have done some label renaming and added comments.
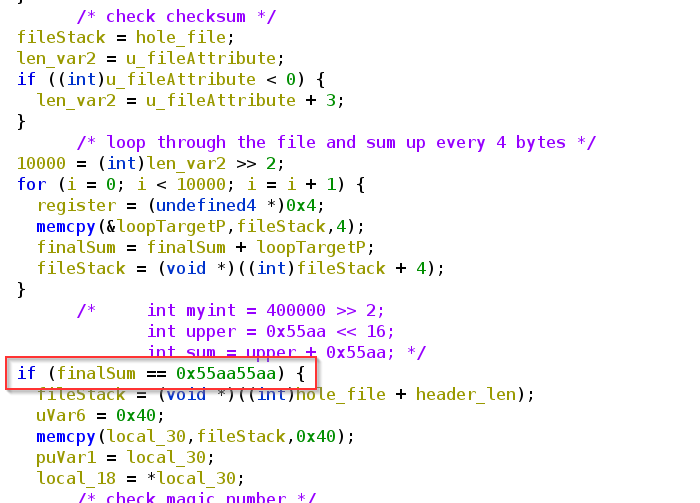
I spent again hours and tried to figure out how this sum was calculated and wrote a python script that hopefully does the same stuff:
f = open(sys.argv[1], 'rb')
fileSize = os.fstat(f.fileno()).st_size
fileSize = int(fileSize / 4)
checksum = 0

for i in range(0, fileSize):
	f.seek(0, 1)
	mybytes = f.read(4).hex()
	checksum = checksum + int(mybytes,16)
But this didn’t worked and I was not able to figure out how this sum was calculated or what this mysterious 0x55aa55aa means.
After some hours of googling around dlink checksums I finally found a post in the openWRT forum, this post leads me to the Russian dlkin community forum and a post where someone did already a hole firmware rebuild! Yes!! this post was a goldmine, even this post is about another dlink model there are some really good information about the building. With google translator I figured out that there is an extra binary „addchecksum“ from dlink which is calculating the checksum and adding it to the end of the file. Thankfully the guy from the post also added the link to the taiwan dlink resource page where we can find all firmware packages, with source code and necessary building instructions: https://tsd.dlink.com.tw/ddetail
In his post he also mentioned the necessary lzma version and that these is also stored in the dlink repo.
Very interested in how this „addchecksum“ tool works I checked it with Ghidra (already done some relabeling)
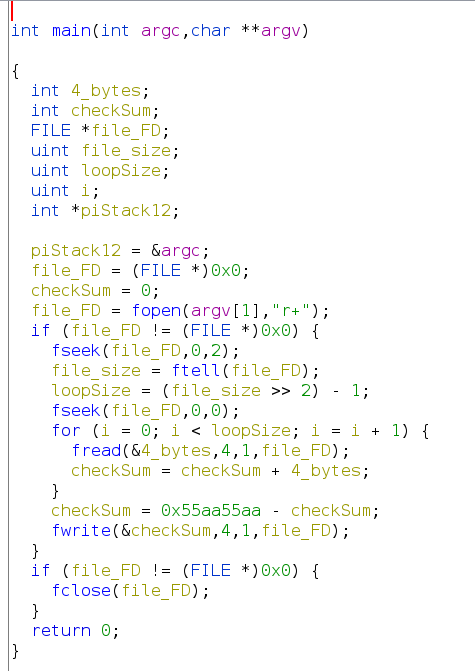
As we can see I was close with my python script but missed some things like the care about 32 bit byte size, reading the bytes in little endian and subtracting this „magic“ value.
So here is the working final script
#!/usr/bin/env python3

import sys
import os

f = open(sys.argv[1], 'rb')
fileSize = os.fstat(f.fileno()).st_size
print("filesize: ", fileSize)

fileSize = int(fileSize / 4)
checksum = 0x00000000

for i in range(0, fileSize-1):
	mybytes = f.read(4)
	mybytes = int.from_bytes(mybytes, byteorder='little')
	checksum = 0xFFFFFFFF & (checksum + mybytes)

finalsum = 0xFFFFFFFF & (0x55aa55aa - checksum)
print("checksum: ", hex(finalsum))
You still need to swap the endianess.
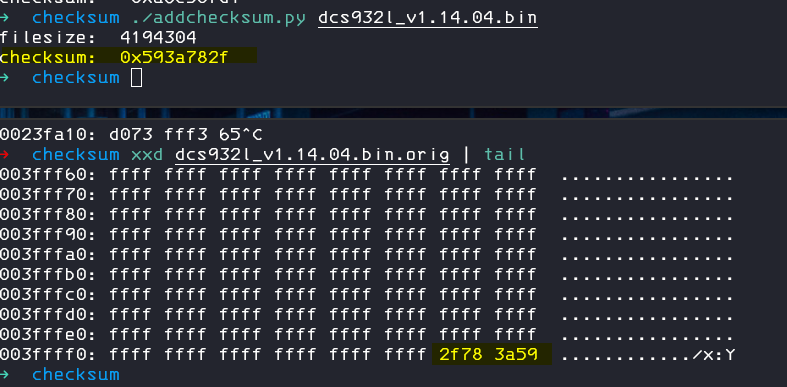
But we can of course just use the binary from the repo to add our new checksum to our new image
./addchecksum dcs932l_v1.14.04.binIssue 3: Corrupted Data
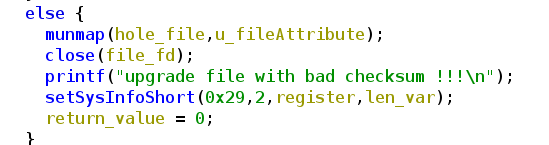
Well, now we have a correct checksum, we can pass this check, the upgradefw binary will not complain anymore about it, but we will be instantly confronted with a new error message: „upgrade file has corrupted data“. Ok, we now what to do, lets quick jump into Ghidra again and check the source of this error
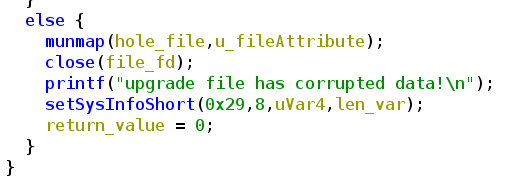
This else belongs to this if statement
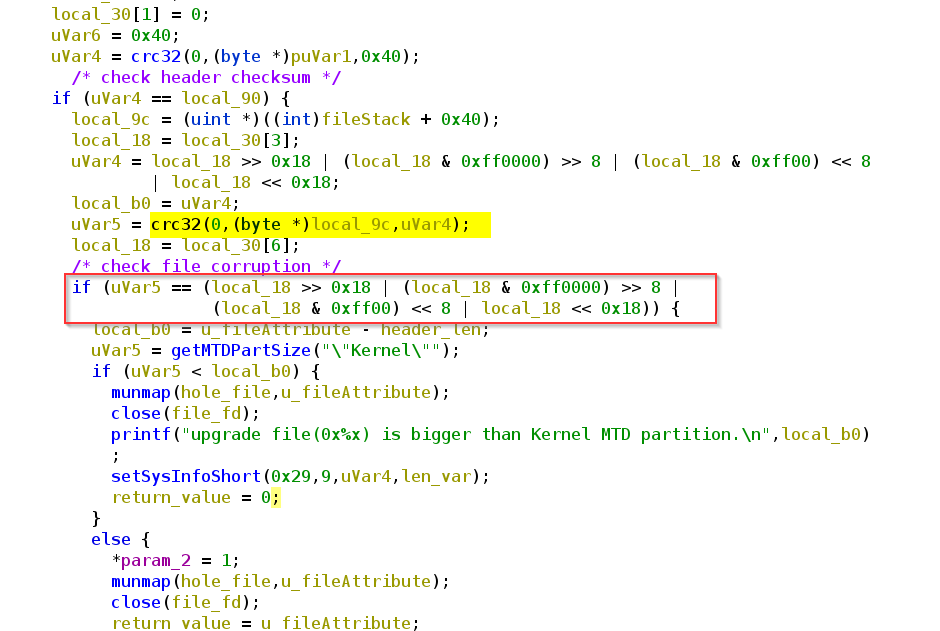
What we can see, right in front there is some crc32 check. If we look again at our binwalk output, we can recognize some crc sums.

Data CRC: 0x531E94DE, maybe this is a crc sum about the lzma archive / data.
Lets try to proof this and extract the archive from the original firmware
dd if=dcs932l_v1.14.04.bin skip=327744 bs=1 of=kernel.lzma
This doesn`t look correct, but we can remember that on the end of the data, there is some „footer“, so lets try to only extract the exact amount of data for the lzma archive.
With hexedit we jump to the end of the file, seek back until we reach the end of the archive data.
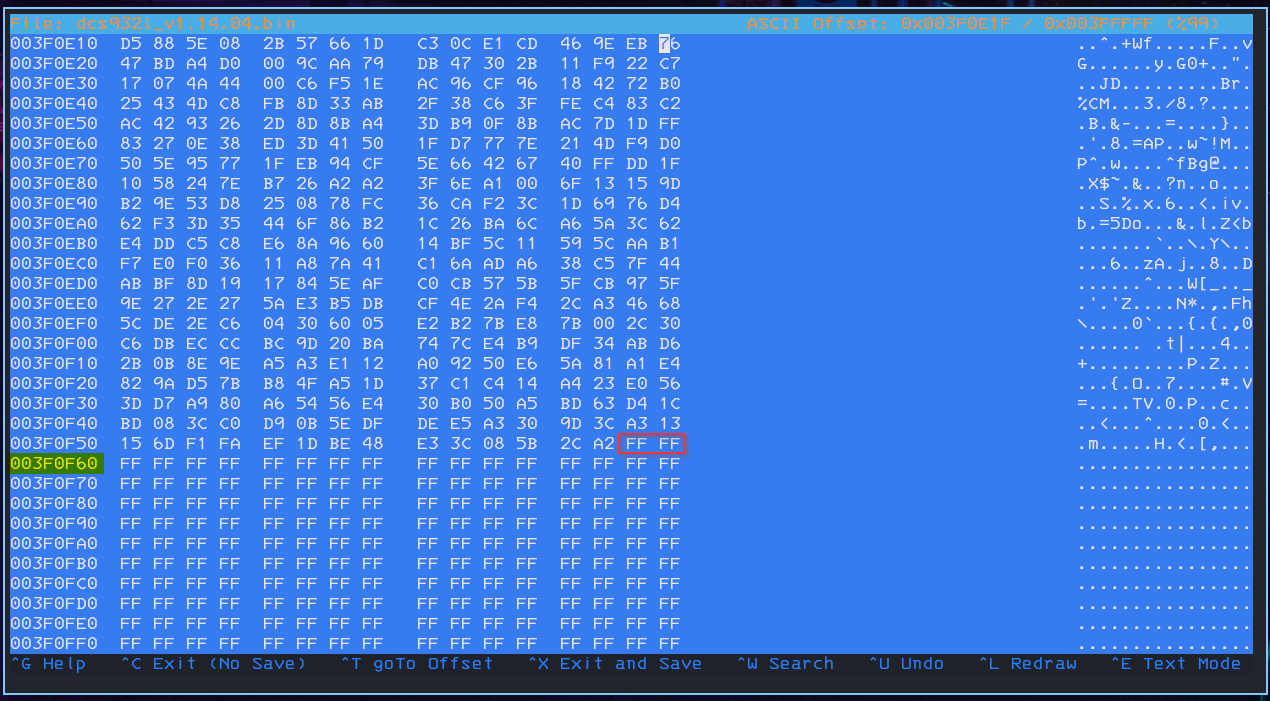
We are using this address – minus 2 becouse we want to get rid of the last two 0xFF bytes too.
0x003F0F60 – 0x2 – 0x50040 (starting address of lzma) = 0x3F0F5E
In decimal (what we need for dd) = 3804958
So lets extract the archive again, but this time without the „footer“
dd if=dcs932l_v1.14.04.bin skip=327744 count=3804958 bs=1 of=kernel.lzmachecking again with crc32 and yes, this looks good!

we can now calculate the crc sum, lets replace them in our build header!
Issue 4: CRC Header Sum
As soon we correct the CRC data sum in the uImage header, you can already imagine it…
yes:
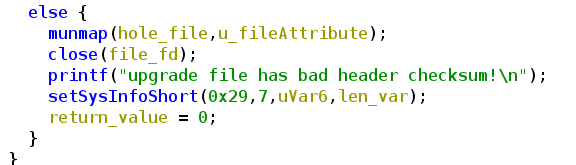
Well, this is obvious, after editing the header of course the crc from the header will change also, so we need to correct them.
What first seems to be an easy task, because we know exactly where the header begins and ends, was a little bit more tricky then I thought.
The problem is, the header itself contains the crc sum of it, so how should I calculate a correct crc sum of the header when after this I need to change the header again to store the crc into it? This will break the crc check again. Thankfully somebody else asked this question and there is a simple solution for it:
1. Set the 4 bytes where the crc sum is stored to 0
2. calculate the sum of the header with the stored zeros
3. finally replace the 4 bytes again with the new crc sum
We can again proof this in our original firmware.
Extract only the header
dd if=dcs932l_v1.14.04.bin skip=327680 count=64 bs=1 of=header.binFind and replace the crc sum with 0 bytes


Calculate the sum and we can see that crc32 sum now matches:

Issue 5: Sizes and Compressions
This was the second part which costs me (too) much time. We already learned in the last part of the image, the lzma compressed kernel has some 0xff bytes as footer. It was obliviously that if we rebuild the image we need to care about the footer to reach the same file size.
But what completely not obliviously is, is the fact, that we also need to care about the file size of the compressed cpio archive. This is a little bit confusing because in the original firmware there is no „padding“ at the end of the archive.
I finally managed to figured this out after many many checks. First of all I wanted to reach the exact same compression file after unpacking and packing again. I tried all different levels (0-9) with the old and a new lzma version but even if I reach the same dictionary and compression size (level – 4), the final file size still differs about a few bytes.
The main problem is, the original packing is done by mksquash_lzma-3.2 which uses mksquash-fs3.2-r2 and the lzma 4.42 or 4.43 skd for the final compression. I was not able to compile either the mksquash or the lzma stand alone binary on my more or less up to date kali machine. The mksquash failed with one make error after another and the lzma sdk seems to only contain windows ready compile instructions. So finally I compiled the lzma#.exe out of the c++ project folder of the sdk in my windows 10 box.
And yes, after some tries I figured out that the following parameters build the exact same lzma archive for the cpio.
Lzma#.exe e -d20 kernel_fs.cpio kernel_fs.cpio.lzmaexact dictionary size, exact compression size, exact file sitze, no differences in the file content, perfect. And indeed the firmware update works the first with our self build image!! Yea
After this I thought I just figured it out and startet to change only byte the in cpio archive. I changed the comment begin # to a new line for the startup script, to enable telnetd on startup. I compressed the cpio archive again and even the file size of cpio archive was the same, the file size of the compressed size differs about a few bytes. Well, I thought, this should be intended, because firmware updates usually comes with some changes in the root_fs and then of course also the compressed file size will change, in the end we add a padding nerveless.
But, to my suprise the fimware image failed again. Damn, I started to search in the header data of the kernel if I missed something, maybe there is a file size of the cpio archive stored or what ever. I was not able to find any related byte array to the archive size so as a last resort I just filled the missing bytes in the lzma archive with 0x00 to reach the same size. And…. yes, the firmware image succeed and my first personal custom image was flashed to the device 🙂
With this new information I started to check if I really need this windows lzma version for packing or maybe always only the file size does matter and not the exact compression. The answer is not a clear yes, because it depends. So you just cant use -9 (which works pretty well for the whole kernel), -4 also does not work because then your file will be bigger then the original one. I figured out -5 works pretty well, maybe -6 or -7 also will work even if the dictionary size it then different to the original one.
So I would suggest to use mode -5 as long your final archive sizes will be smaller then 2520107 bytes, then fill up the rest of the archive with 0x00 bytes to reach the 2520107 bytes.
Automate the Building
Finally, after two weeks and more then 50 hours spending into this project I managed to build a custom firmware (just implemented my logo here).
As this whole process does involve many manual steps with a lot of risk to make something wrong, I wrote a python script for the extraction and re packing of the firmware. This was only tested with the firmware 1.14.04, it may work with other versions but then you should adjust the file sizes in the script!!
The unpacking
you can extract the firmware via
./dlink_fw.py unpack dcs9321l_v1.14.04.bin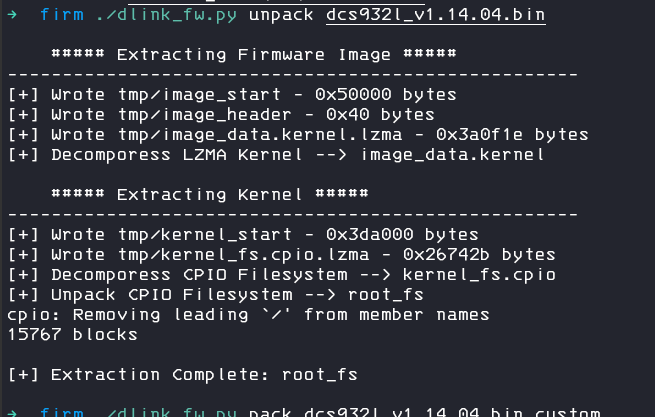
This will create a new folder tmp with all extracted data, don`t touch this folder, we need the files for the packing.
There will be also a new folder root_fs, this is your desired target 🙂
Make sure you edit the files as root and don´t put to large files into it, as this archive has a file size limit.
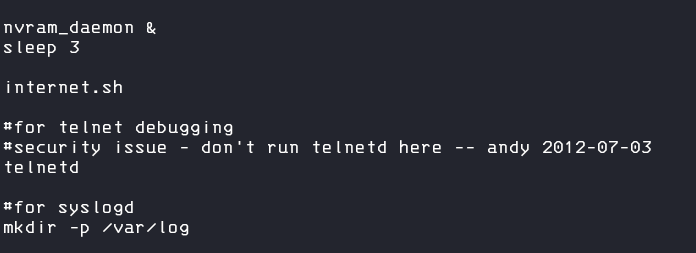
One juicy place to edit is for example the startup script, you can found this at root_fs/etc_ro/rcS
So lets edit this and un-comment the telnetd start
The packing
Now, we can rebuild the firmware with the command
./dlink_fw.py pack dcs9321l_v1.14.04.bin.custom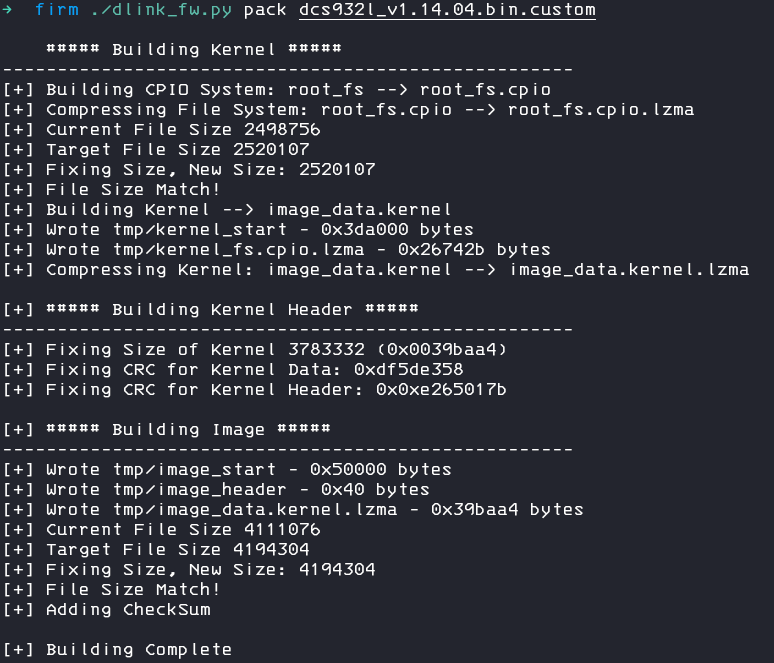
After flashing the device, we can logon to the device via telnet 🙂

You can find the final script and all resources on my Github Repository: https://github.com/secure-77/DCS-932-FwBuilder
Thanks to stacksmashing for the great template.
Troubleshooting
The upgrade with a custom firmware is really picky and its more likely that it will fail instead of succeed, thankfully there is a recovery mode for this device where you can upload a new firmware after a failed upgrade.
You can enter this mode by pressing the reset button after powering on the device and hold this button until the blue led turns off. After this, connect the cam to a LAN, set your local ip to 192.168.0.10 and you can access the cam via the web browser on 192.168.0.20. If the recovery site does not respond to your firmware upload, try another browser (chrome worked for me, firefox not).
There is also a recovery mode via tftp which you can activate via serial mode, but this brook my device (no more chance to recover) and I had to buy another cam, so I cant recommend this mode.
If the firmware upgrade will fail every time, check if your compression is correct, try to use the sdk lzma (the windows binary or build it by yourself), comment out the compression lines in the script and do these steps with the sdk binary by yourself.
Sources and Useful Links
- Emulate this device (didn’t tried that)
- D-Link FTP Firmware Download
- Different Firmware unpacker scripts
- Building a custom Firmware D-Link DCS-2130
- LZMA 4.43 Source Code
- LZMA 4.32 beta Source Code
- openWRT Forum Post about DCS-930
- Russian D-Link Community Forum Post about DCS-933 Firmware building
- D-Link SDK and Source Code Downloads