In my last post I described how to get a shell on the device, but my final goal was to extract the firmware, manipulate some data in it and rebuild it so that I have a custom firmware for this device.
This is a three part long story
- RE: DC-932L Hacking a Webcam Part 1 – Getting a Shell
- RE: DC-932L Hacking a Webcam Part 2 – Extracting the Firmware
- RE: DC-932L Hacking a Webcam Part 3 – Building the Firmware
There are some good resources about this topic and finally the extract process is not so complicated if the firmware is not encrypted, what thankfully is not the case for this device. Although there is one newer firmware version available I decided to focus on my current firmware dcs932l_v1.14.04.bin` you can download it from the D-LINK FTP server.
Stage 1 – Bootloader and uImage
The tool to go is binwalk

As we can see, the image is separated in different parts, the interesting part is the LZMA compressed data section.
There are multiple ways to extract the archive from the image, you can use binwalk -e to extract all parts or use the tool dd to extract only a defined part.
dd if=dcs932l_v1.14.04.bin skip=327744 bs=1 of=kernel.lzmaAfter extracting the kernel, we need to decompress it. There are a few tools to extract the compressed data
- lzma -d
- unlzma
- lzcat
One litte thing we need to care about: lzma -d will complain about corrupted data. This is because we extracted all data just from the beginning of the lzma archiv to the end of the file, but the actually lzma data are not so long, there is another section after the archive, lets call this „footer“. This footer does not contain any „real“ data, so binwalk cant find any magic bytes for this section and so it didn’t recognize it.
If we investigate the extracted archive and check it with hexdump, we can see that the „lzma data“ are followed by a chunk of 0xffffffff and a checksum.
For only extracting the archive, at this point, we don´t need to care much about this. We can either adjust the dd command to only extract the exact amount of lzma data or just use lzcat or a little trick with lzma to ignore extracting errors.
lzma -d < kernel.lzma > kernel
lzcat kernel.lzma > kernel
Stage 2 – The Kernel
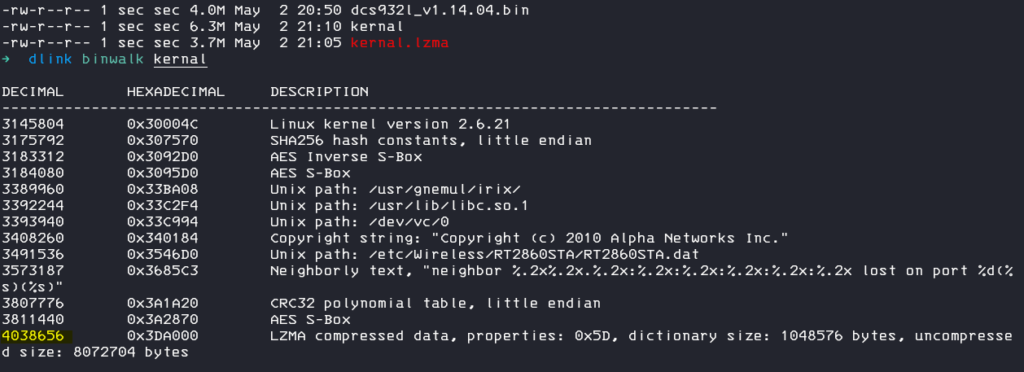
Lets check the extracted kernel again with binwalk

We can see, that there is another lzma compressed part in the kernel, so we can just repeat the steps.
- extract the part out of the file
- unlzma it
dd if=kernel skip=4038656 bs=1 of=stage2.lzma
unlzma stage2.lzma
check what we have now
file stage2
--> stage2: ASCII cpio archive (SVR4 with no CRC)
It´s a cpio archive! That seems promising, we create a new folder and unpack the filesystem.
mkdir root_fs
cd root_fs
cpio -idm --no-absolute-filenames < ../stage2
Nice, we now have the root file system of the device and can start hunting for sensitive information and reverse engineer the binaries.

I checked the startup file and saw an interesting comment in the code

So, what about if we just uncomment the telnetd command, so that our device will always run telnetd on startup?
I thought about, how hard can it be to just remove (or change) one single byte and rebuild the firmware?
Well, I figured it out and the answer is: really hard, even if you don`t change any byte.
But follow my next blog post to read about it: RE: D-Link DC-932L Webcam – Building the Firmware

